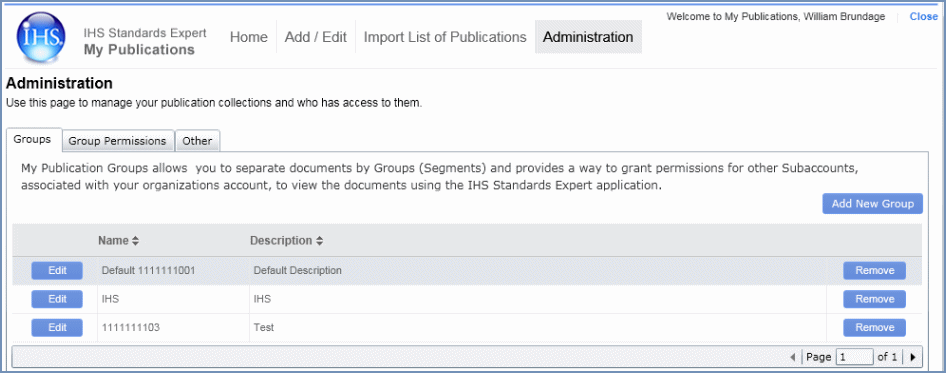
To add or remove a group, click the Groups tab on the Administration page of My Publications.
The Groups page lists the name and description of the groups that have been created. You can Add a New Group, Edit a Group, or Remove a Group using the appropriate button.

When an administrator adds document information to My Publications, the administrator enters metadata into an Add a New Document form that contains fields for various identifiers associated with the document. To view a list of field names and definitions, see Review Field Definitions or review the topic Adding and removing groups, which contains an Add a New Document form. One of the identifiers is Group Code. Each document must have a Group Code, and if a Group Code is not associated with an account, a default group is automatically assigned. When you associate a Group Code to a document, that document becomes part of the collection of documents associated with the Group Code. To better organize your documents you can name a group by type, department, location, or other designator that best fits your needs.
To add a new group
Click the Add
New Group button to the right of the Groups tab.
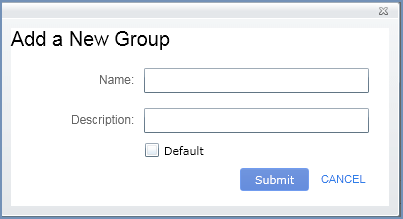
The Add A New Group box is displayed.

Enter a Name and Description.
The Name should be a short name of the Group. The Description is an
extension of the name and can contain any valid information to help in
describing the Group.
If you want this group to be the default, check
the Default box.
Selecting this option removes the default indicator from any other
Group and assigns this Group as the Default.
Click Submit
to create the group
OR
Click the Cancel link to stop
the process.
Created groups are displayed in the results list. The default group is identified with "(Default)" to the right of the Group Name.
To change the name, description, or default status of a group
Click the Edit
button next to the group you want to change
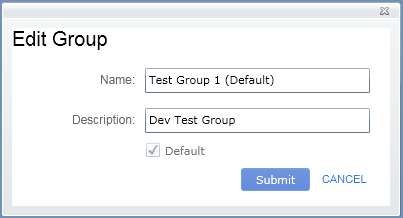
The Edit Group box is displayed.

Change the Name and/or the Description.
The Name should be a short name of the Group. The Description is an
extension of the name and can contain any valid information to help in
describing the Group.
Check or uncheck the Default checkbox.
Selecting this option removes the default indicator from any other
Group and assigns this Group as the Default.
Click Submit
to save the changes
OR
Click the Cancel link to stop
the process.
To delete a group
Click the Remove
button.
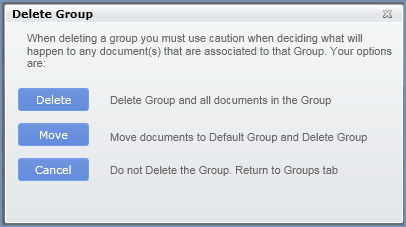
The Delete Group box is displayed.

Select Delete,
Move, or Cancel.
Be careful when deleting and moving groups and consider the use and
associations for each document in the group before taking action.
Selecting Delete provides a
confirmation message that states: "Please confirm the deletion of
# of document(s) and the selected Group from the database." Clicking
OK deletes the document(s)
and the selected Group. You will then be returned to the Groups tab.
Selecting Move provides a confirmation
message that states: "Please confirm moving # of document(s) to the
default Group and the deletion of the selected group." Clicking OK moves the document(s) to the
Default Group and deletes the selected Group. You will then be returned
to the Group tab.
Selecting Cancel stops the
process and returns you to the Groups tab.
Related Topics:
Managing publications and permission
Assigning groups to a one or more Subaccounts
Exporting and/or deleting all publications